Meetings and schedules
Meeting and schedule, providing multiple functions of new schedule, schedule reminder, classification management and meeting arrangement, effectively managing my daily schedule and time arrangement, rapidly improving work efficiency, and missing every important meeting or appointment.
Mailbox entry: log in the mailbox, and click "my agenda" in the left navigation bar to enter.
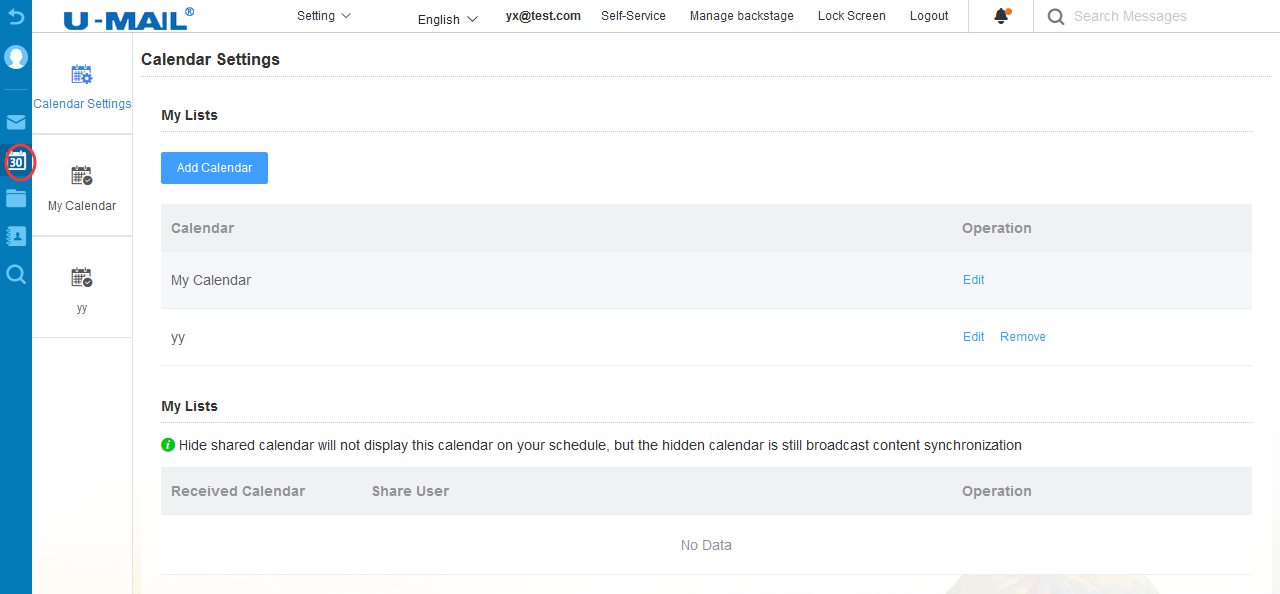
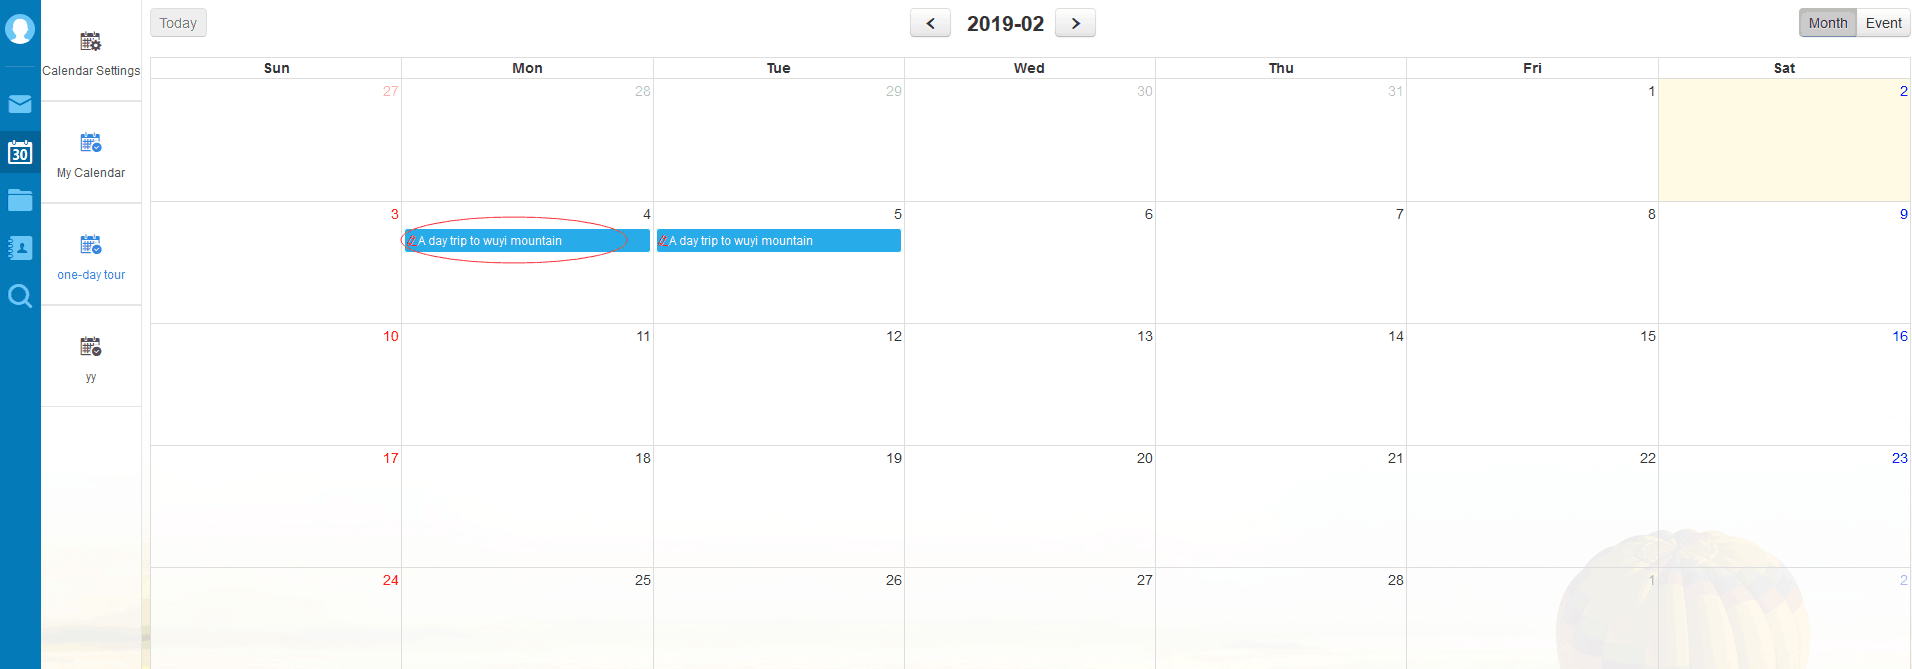
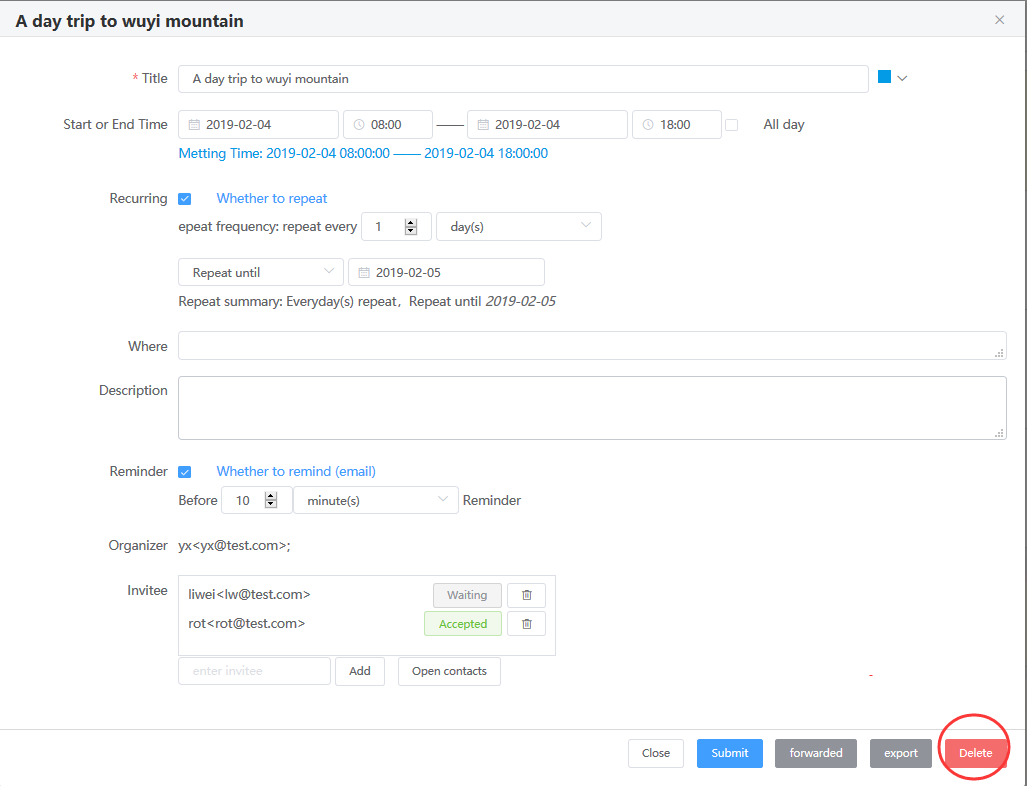
Click on the newly created schedule to view the schedule information.The calendar display page shows basic information about the calendar, how often it repeats, and how events are reminded.The following figure。
There are five function buttons below the event information, click "modify" to re-edit the schedule, click "forward" to send the schedule, click "download" to download the schedule to local, click "delete" to delete the schedule, and click "close" to return to the original view。
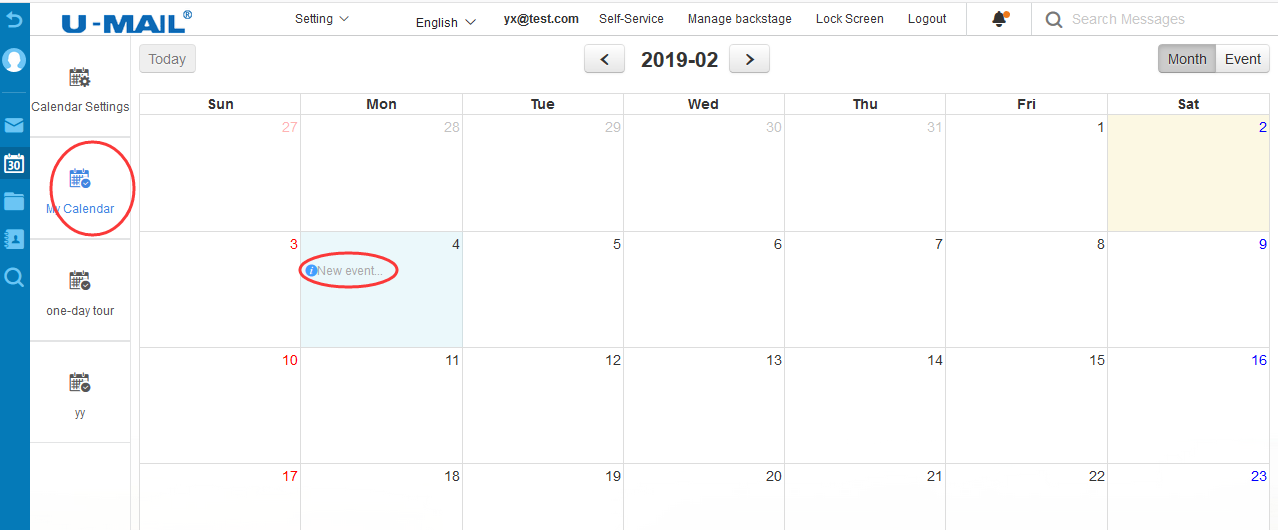
U-mailThere are several ways to add meetings and schedules:
- 1)From the month view to a specific day, click "new event";
- 2)Select a day and double click to enter the add schedule page;
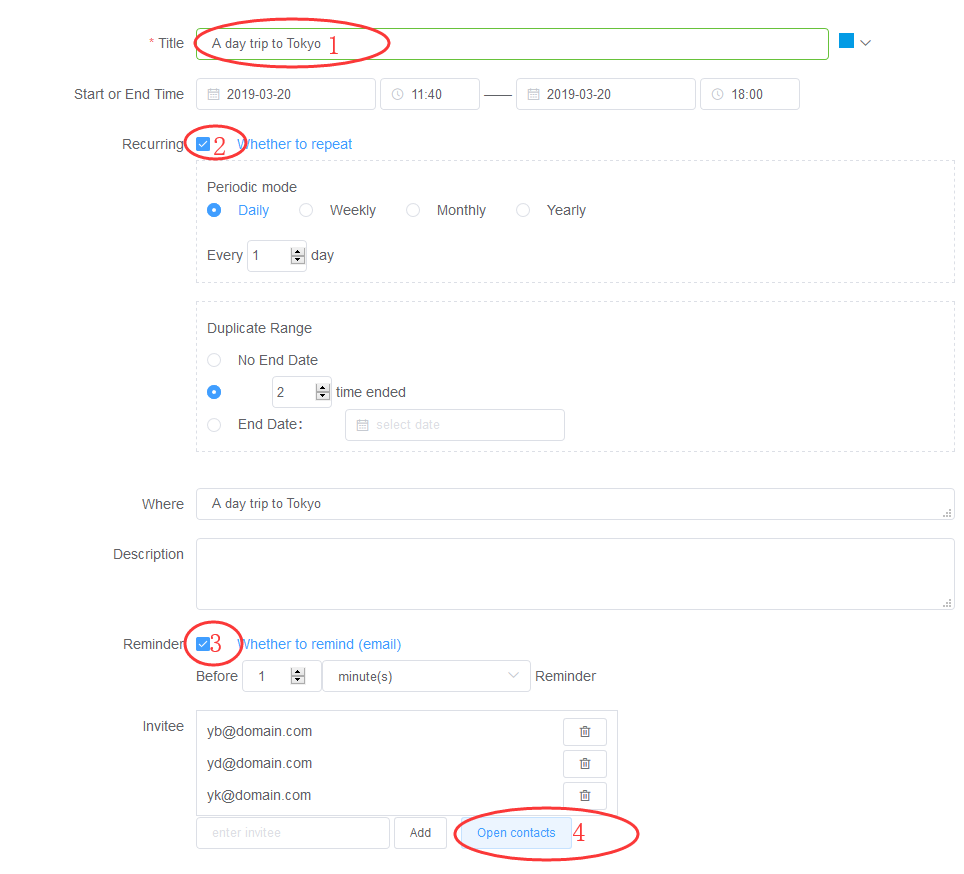
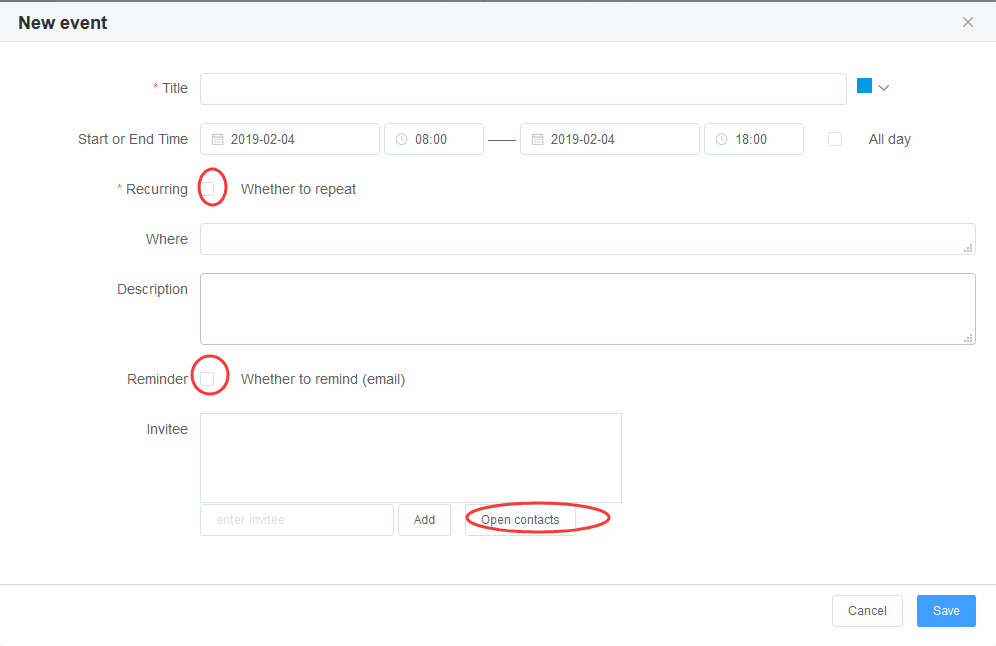
The new event page contains basic information, who to invite, schedule, repeat frequency, and how to remind of events.After filling in the corresponding information and saving the event, the schedule is added。
-
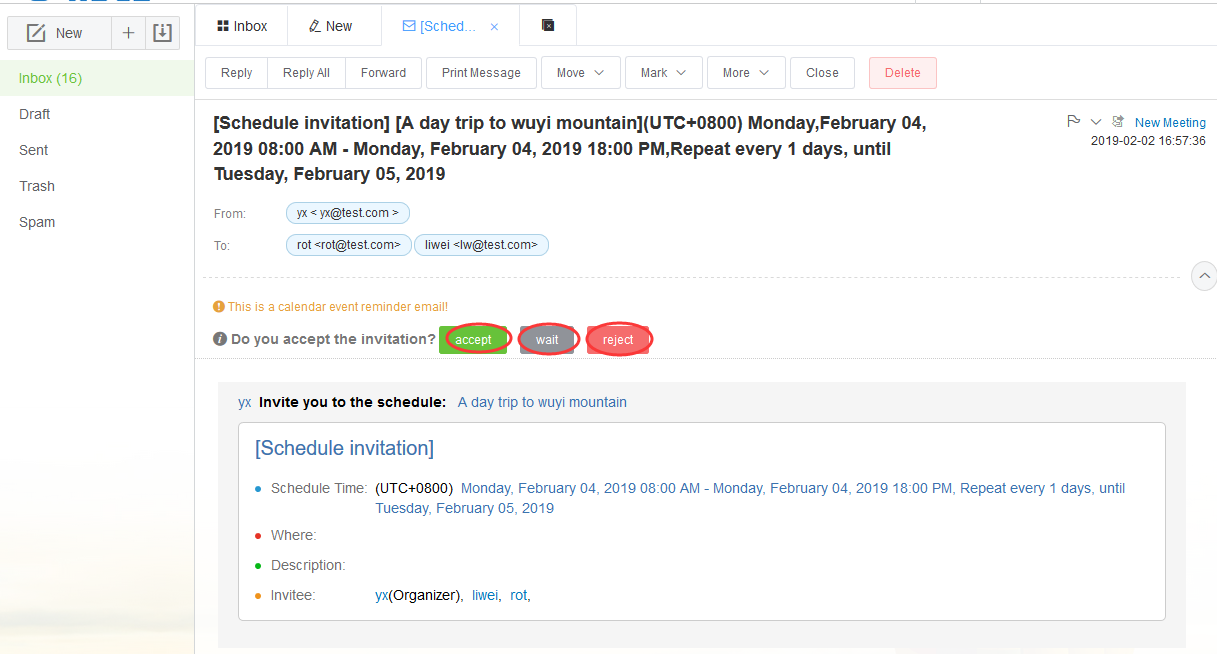
When you receive the invitation, you can choose "accept", "charge" and "refuse", and the organizer will receive your reply immediately。
-
You can delete an individual schedule by:
- Click schedule to enter the full schedule view page
- Click the "delete" button at the bottom of the page to delete the agenda
In the top left column of the event view of schedule management, you can see the search box of "quick search". You can quickly locate the agenda you are looking for through keyword search。
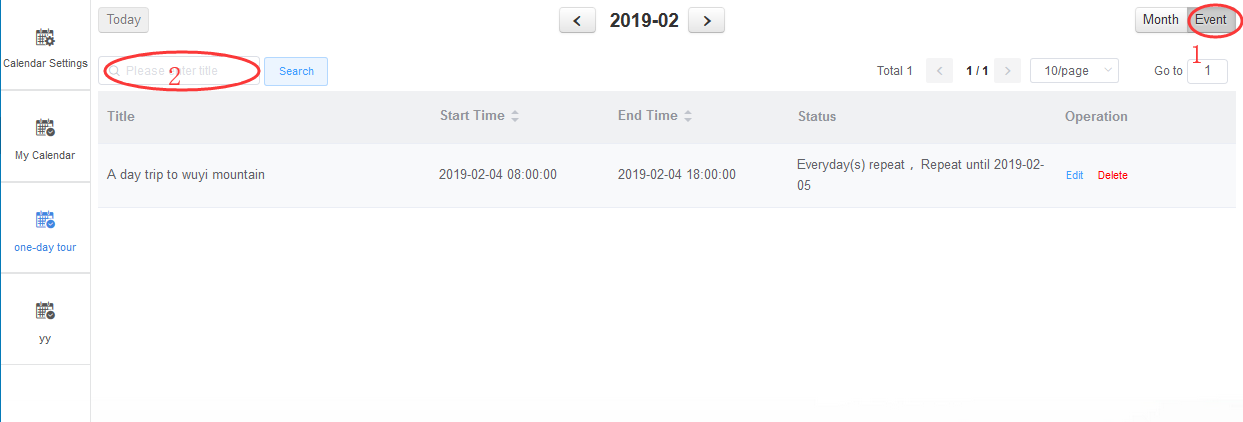
As shown in the figure above, enter the keyword in the search box, click search, the system will find the name of the event for you, the location, the description has a matching keyword schedule, displayed in the middle of the main area。
Calendar synchronization is the process of creating and deleting a calendar in webmail, keeping the calendar in sync with the user's calendar in outlook, and vice versa. You don't need to worry that when you use the outlook mail client, the webmail calendar and local outlook calendar are not the same, resulting in schedule chaos. The u-mail schedule supports the synchronization with the outlook and other clients, while the synchronization with the mobile terminal requires the user to purchase the u-mail push service. To achieve two-way synchronization of Outlook schedule and u-mailmial server, the u-mail client address book plug-in needs to be installed.
-
Click the meeting and schedule navigation button on the right, as shown below:
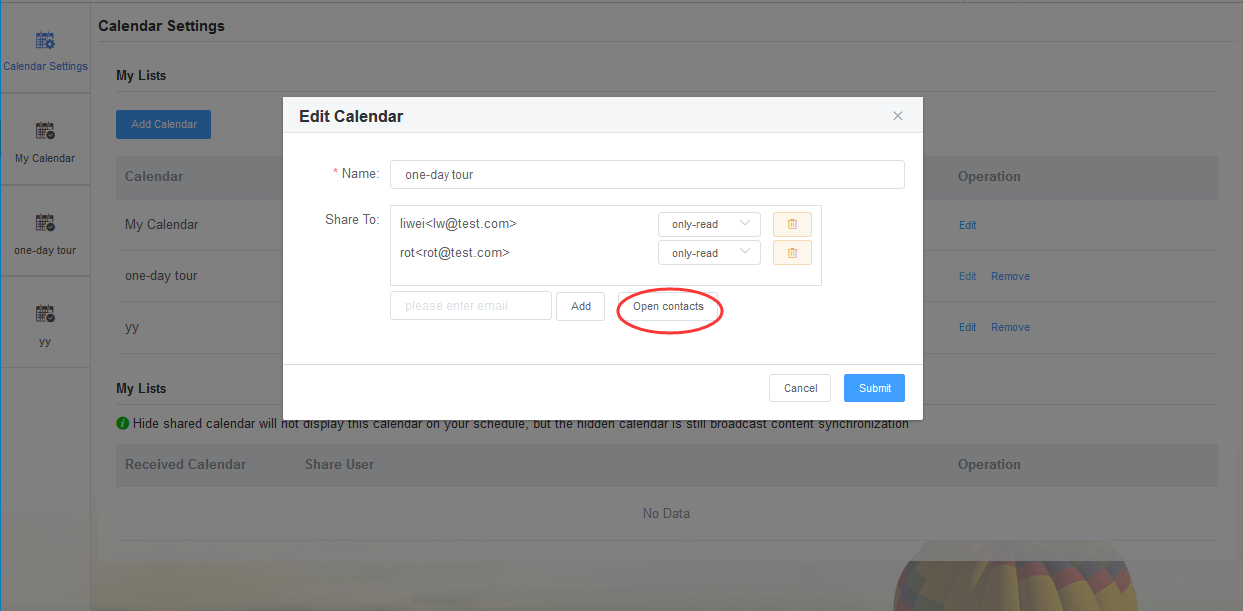
Click schedule management and set the corresponding permissions. The steps are shown in the figure:
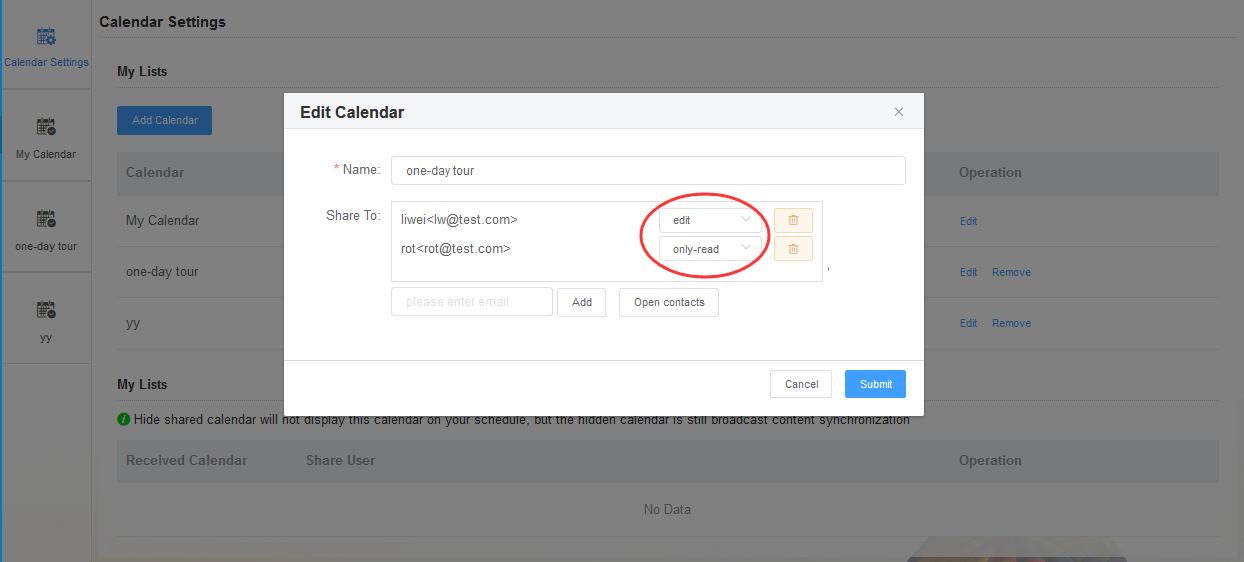
You can set the permissions of other users to handle your mail: read only, edit only, default is "read only"。
View permissions: only the Shared agenda can be viewed, and no action can be taken。
Edit permissions: edit only the agenda Shared with you; Erasable schedule。
Step 1: Download "Outlook CalDav Synchronizer"
Method 1: Search for "Outlook CalDav Synchronizer" and download, friendship download link: https://caldavsynchronizer.org/de/download/
Method 2:Download
Step 2: Installation and configuration
1)Unzip OutlookCalDavSynchronizer-3.X.X.zip and click setup.exe to install it.
2)After the installation is complete, open the Outlook menu item with "CalDav Synchronizer", as shown in the figure:
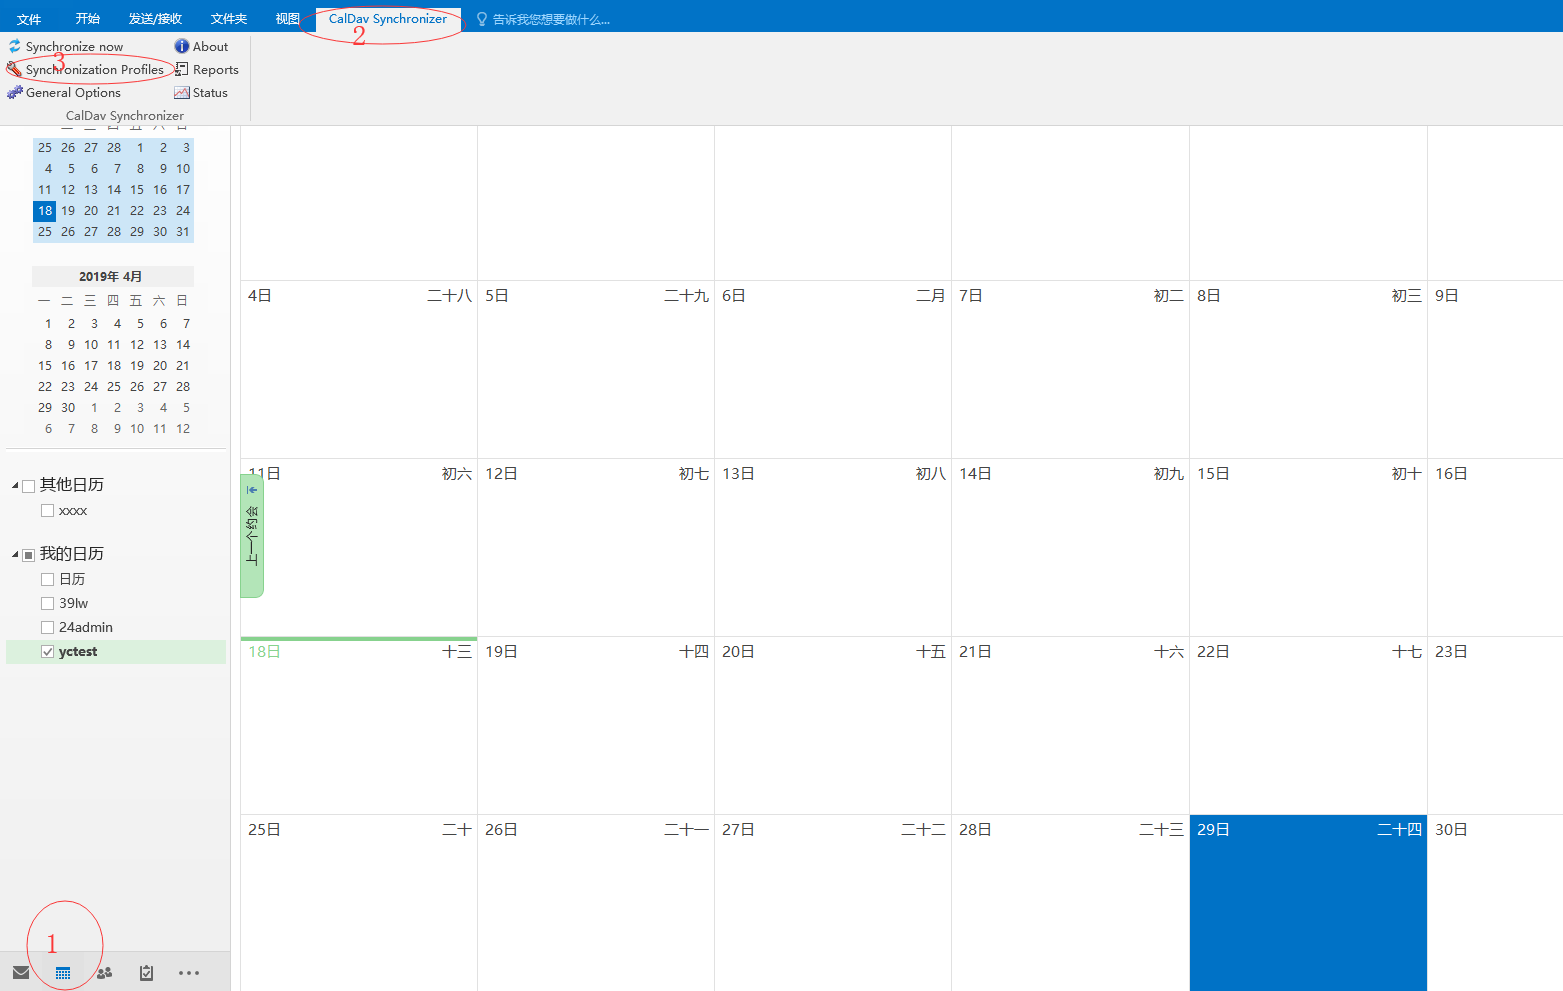
3) Click on the "3" position in the above figure, Synchronization Profiles to configure, as shown in the figure:
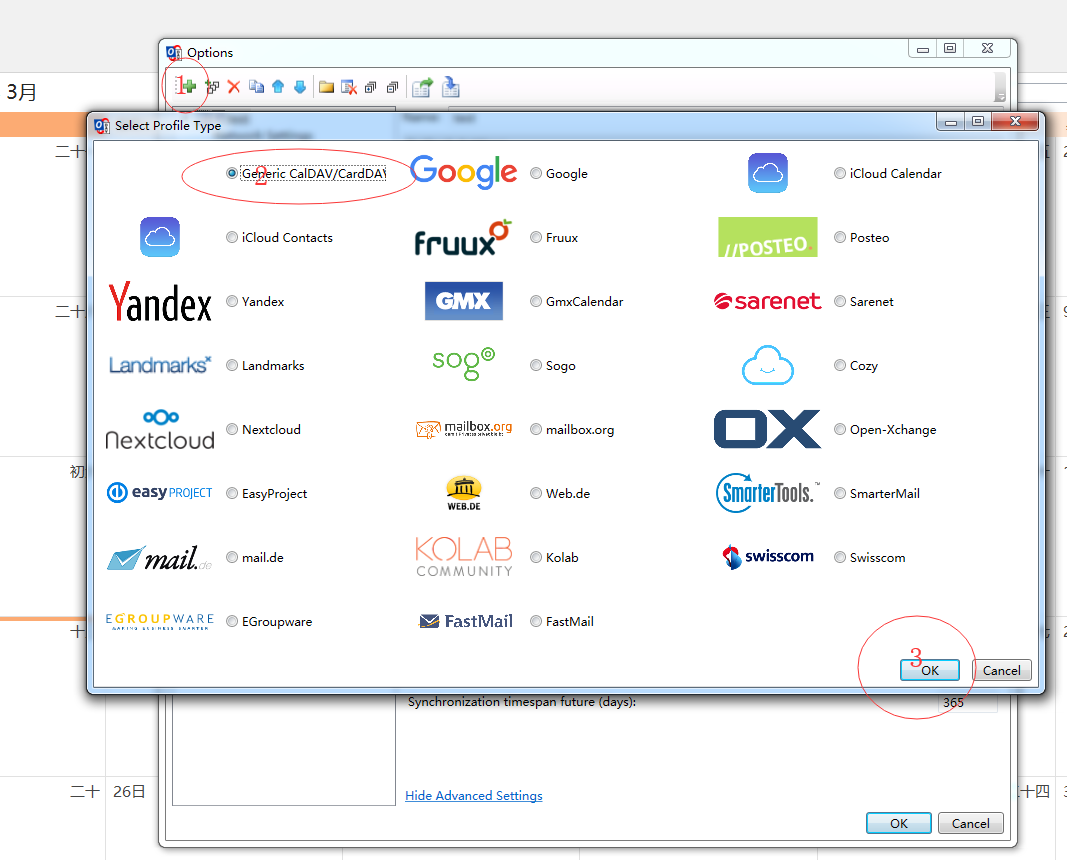
4)Detailed configuration:
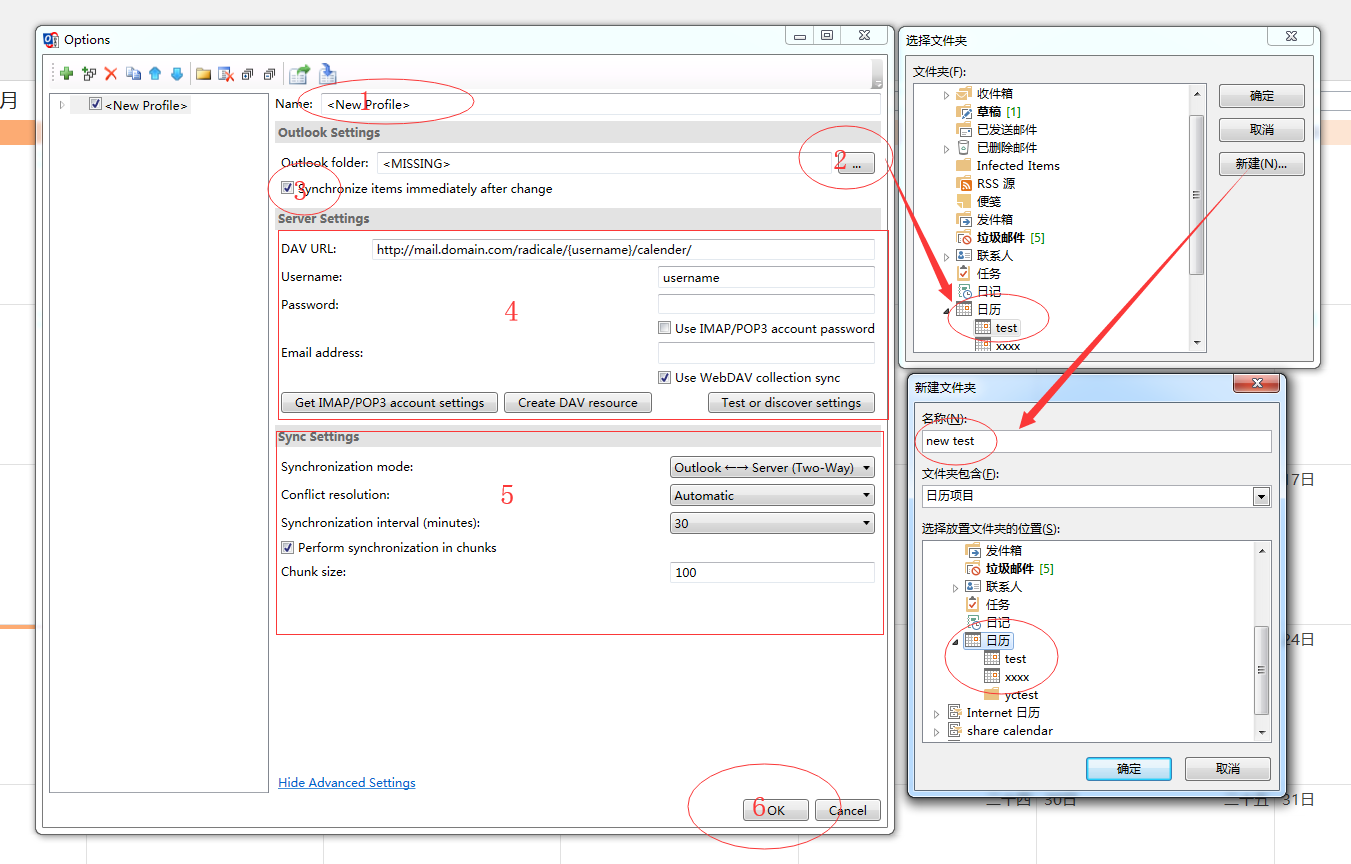
- a) "1" is the Name;
- b) "2" is to select the calendar folder or create a new calendar folder;
- c) "3" is synchronized to the server immediately after the default modification of Outlook;
- d) "4" first configure "DAV URL", the link is: http://mail.domain.com/radicale/{username}/calender/, where username is the full account on the server; then configure the account and password on the server;
- e) "5" can be configured with default parameters;
- f) Once the configuration is complete, you can sync your calendar.